Viewing entries in
FIlm Camera Tips

Things to look for when buying  a film LEICA M Camera.

1 Comment

Things to look for when buying a film LEICA M Camera.

Buying a used camera can be a daunting task especially when the camera is approximately 20 years or older. Given the high value and collectability of these evergreen film Leica M cameras, it makes much sense to thoroughly check it before taking the plunge to avoid heft repair bills that might hit you later on. Having collected more than 50 cameras over the past 8 years, I have formulated some simple steps on how to perform these check on your own.

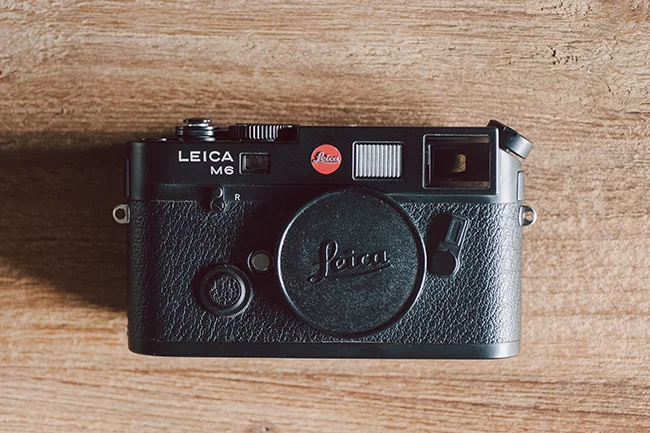
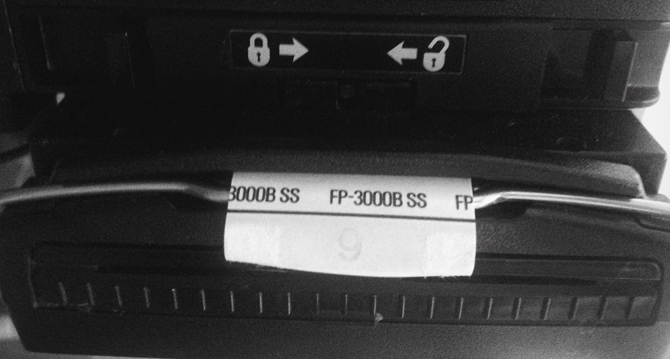
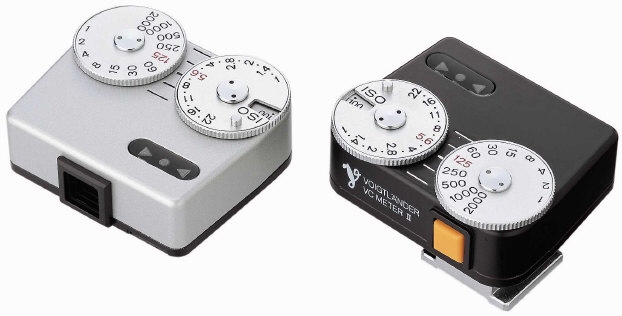
  1. Visual inspection. - Check for wear. Usually, high milage cameras tend to have more scratches on the bottom plate, top plate as well as the leatherette area near the strap lugs . For Leica M2 and M3, top plates scratch near the Leica script as well as the shutter speed dial usually resulted from the Leica Meter attachment . That is pretty normal for user grade cameras. The scuffing usually comes from installing and removing these light meter. Just ensure no dents or flat edges as it’s an indicator that the camera has been dropped and might have some internal damage.

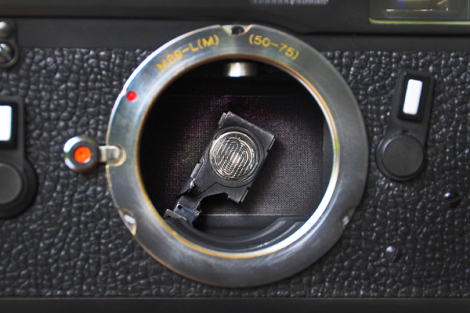
  2. Check the condition of the viewfinder and rangefinder window - If you view the camera from the front (where the lens mount facing you), you shall see 3 windows. One being the viewfinder with the biggest opening (right), the middle opaque window is the frame line illumination window and the smallest one being the rangefinder focus window ( left ). Ensure the mirror element inside the system has no desilvering ( black markings ) which usually happens from moisture buildup. The moisture penetrates the silver coating on the back of the mirror, causing it to separate from the mirror glass leaving black dots or marking on the affected areas. If you see this, avoid the camera at all cost as the desilvering will worsen over time and it’s costly to replace.

  3. Perform a focus test with a lens. Look through the viewfinder as well as the centre focus patch, it should be sharp and bright. Should you see any hazing or mild blurriness in the viewfinder, it’s an indication that it might have fungus or oil evaporation. This usually requires a full overhaul / CLA ( clean, lubricate, adjustment ) by a certified technician.

    Turn the lens focus tab from one end to another, ensure the focus patch is moving smoothly. Try moving the frame line selector and ensure it is not stuck in any position. Stuck frame line selector and rangefinder focus patch is common when the camera is left in the drybox for too long as the lubrication dries up.

  4. Do a rangefinder accuracy test. Unlike digital cameras where you will be able to instantly preview your shots to check if the rangefinder is in sync, but for a film camera that is not quite possible. One easy technique is to use a very far object such as a building, mountain or even the moon for focus test. Focus the lens to infinity and ensure the subject on the focus patch match up perfectly in both the vertically and horizontally. If it’s not, the rangefinder calibration is out of sync and require adjustment.

  5. Check the shutter curtain for any sign of damage. Remove the lens or cover from the body. Set the camera to 1s shutter speed, cock the shutter and trigger a shot while pointing the shutter at a strong light source. Observe if there are any holes or light leak through the shutter curtains. As camera ages, the cloth may tear or worse case scenario being eaten by bugs. 

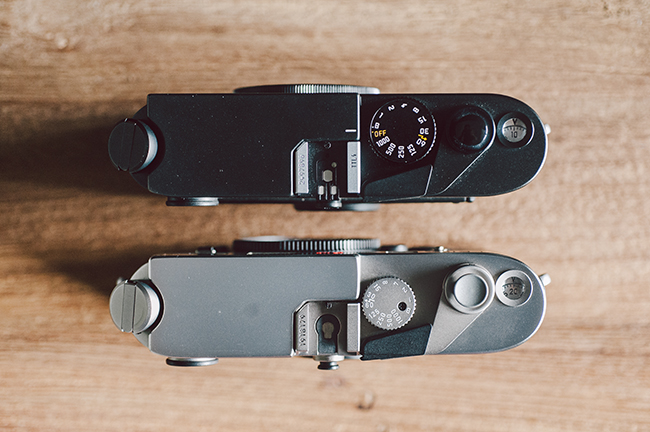
  6. Test all shutter speed, specially 1/30s and below. Older film Leica has a tendency to freeze up as low shutter speed. This happens when the camera internal lubrication has all dried up causing the gear system to be stuck. Place your ear close to the camera and try to listen to the shutter mechanism as you cycle through all the speed from 1s to 1/1000s. It should be smooth and clicking without hesitant. If you hear irregular clicking …it’s a sign it needs a CLA. Repeat the same process for cameras with self-timer too.

  7. Check the shutter counter . Ensure it’s working as it should. Once you remove the bottom plate, the shutter counter should reset back to zero. For M2 it has no auto-reset while the M3 film counter will only reset itself when you remove the spool. From M4 to M6 as well as the new MP , it has the new auto reset once the film is removed from the camera.

  8. Check the film winder, ensure it move freely and not stuck.

  9. Check the battery compartment for sign of battery leak and corrosion.

df.jpg

1 Comment

5 Tips to Improve Your Film Photography

4 Comments

5 Tips to Improve Your Film Photography

Moving from digital to film photography has always been a daunting task. Having the perks of shooting unlimited frames, having a nice preview after every shot and ability to post process the images in photoshop or lightroom certainly gives photographers a lot of assurance. However, working with a film is the total opposite and many find it risky. Here are some tips to help you elevate your film photography to the next level!


1. Exposure is KEY - When it comes to film, exposure is the most important thing of all. The film colours and details depend greatly on the exposure. You may use the same film, same camera and lens but with different exposure, the colours and details will vary greatly.

Below are 3 examples taken with the same roll of film, Kodak Portra 160 with my Rolleiflex 3.5f. Though it may not be the same exact scene but it does give you a fair indication.  The first photo was shot at perfect exposure while the middle shot was overexposed half a stop to give the skin a little more glow. The last shot was shot under (not intentionally, probably too much sake lol ). As you can see the last photos looks faded, desaturated and grainy as compared to the rest of the images. The middle photo has a lot more pop in term of contrast and colours while the first looks more neutral. Play around with the exposure and see which works best for you!

While as for Pro400H colour film, I generally overexpose the film by one-stop minimum for most scenes. If the lighting is rather flat, I would make it 1.5 over to bring out the colours a little more.


2. Expose for the shadows - I think this the most important key factor that most got it wrong when photographers pick up a film camera. Being a photographer started out with digital cameras , we were told countless times to watch for the over blown highlights as most digital cameras have problems dealing with over exposures. We have been told countless times that over blow highlights are bad bad bad in digital.  However this is not the case with film. The shadows is what matters when you are shooting film. Film have a much larger dynamic range than digital sensors , approx 16 vs 12 stops on the average hence it's able to handle highlights pretty well. However film will suffer once it is under exposed.

As an example below on the bottom left , I had my wife standing in front of a glacier. On a typical scene like this, the camera exposure will usually under expose the scene thanks to the huge chuck of snow at the background. Knowing that the main subject on this photo would be of course my wife, hence I did a close up metering on her face , walked back and recompose the shot. It turns out perfectly exposed. I would not be able to produce a shot like this if it was shot with a digital camera without doing the HDR function.

As for the shot of the Tibetan monk, I meter the shadow area which he is as passing through to ensure he is not underexposed. As you can see the highlight on the wall and sky is perfectly intact. That's the beauty of film !

3. Use film within the best before date   - Always use the film within the film shelf life period for optimum quality. This includes shooting and developing the film within that period of time. I often try to buy the freshest film possible so I would have sufficient storage and usage time. Standard film would have around 1.5 to 2 yrs of shelf life hence check always check the film expiry date  just like how you buy a loaf of bread or a fresh carton of milk from the mart. Expired film may look cool sometimes if you are lucky but usually it tend to be more grainy and the colors are highly unpredictable.


4. Don't be over ambitious - Spend time to know your film more before switching  to another type of film.  Every film has it’s own characteristics in term of colors, details, latitude and preferred exposure method. For example , Kodak Portra works best with 0.3 stop over exposure while Fuji Pro400 H needs a minimum of 1 stop over exposure to give the creamy pastel colors.  Kodak Ektar and black and white film works best with perfect exposure . Try out 5 rolls of the same film before switching it out and see which works best for your work.

From left to right  Fuji Pro400H - Creamy pastel color with soft highlights , great skin tone | Kodak Ektar 100 - Sharp, punch contrast, low grain and punchy red color. Fuji Superia - High contrast,  harsh highlights and accesntuate on green color.                         

5. Black and white and color film exposes differently - When I shoot with black and white and color film, I think very differently. For colors I usually look for even exposure scene and I expose for the shadows as what I have explained in point 2. However for BW film, I prefer to hunt for subject or scene which has more dramatic lighting , after all it's the shadow and highlights of a photos that makes a black and white film 'black' and 'white' . I never liked a BW film being too flat without shadows. Hence every time I travel , I often carry two cameras one loaded with box speed or pushed  black and white film while another loaded with color film so that I could switch between the two depending on the lighing condition.

4 Comments

The Best Film Camera For Street Photography

Comment

The Best Film Camera For Street Photography

Analog photography refers to photography using film film with a fully analog camera. Whilst it seems that the ubiquity and the huge amount of digital cameras has squeezed film photography out of relevance however the slow process of film photography is still dear to many street photographers even till this day. Famous names such as Bruce Gilden, Joey Meyerowitz, Louis Mendes , Trent Parke and Jamel Shabazz are all film shooters till this very day. It's the mystique and organic feel of the film look that these street photographers prefer over digital cameras.

For street photography, many photographers including myself love the rangefinder cameras simply because it is fast and being unobstrusive. The ability to zone focus is a huge plus point and the no frills operation makes it a joy to use. If I were to only choose one cameras, my pick would he the legendary Leica M5 and here's why .


1. It's a RANGEFINDER camera

Rangefinder camera has always been the camera of choice for street and war photographers due to it's compact size, extremely easy operation, amazing optics, fast focusing and the ability to do zone focus. With practice, zone focusing can be even faster than any of the auto focus out there in the market. For those who would like to further understand what is aRANGEFINDER Camera, you may check out my past article HERE.


2. Amazing ACCURATE METERING

Not many film cameras come equipped with spot metering and M5 is just one of it.  The M5 metering is certainly one of the best I have used to far. More accurate than most center weighted metered cameras such as the M6, M7 and alike. It never fails to produce amazing results in all lighting situation. This old school CDS cell meter may seem quirky in operation as it positioned right in front of the shutter curtain and it swings down once the shutter is depressed but it worked flawlessly.

image from:https://asingulareye.wordpress.com/2016/05/13/leica-m5-fabulous-or-failure/

image from:https://asingulareye.wordpress.com/2016/05/13/leica-m5-fabulous-or-failure/


3. ERGONOMIC

I often say the M5 is a user camera even though it is not much of a looker ( for some ). The layout of the buttons are so strategically placed. The ISO button is positioned on the top plate which gives the photographer a good reminder which ISO they are working with and for easy adjustment. The huge shutter speed dial which over hangs a little on the edge of the top plate enable the photographer to adjust with just one finger with ease. Also due to the slightly larger and heavier body, it balanced off with heavy lenses such as the Summilux and Noctilux really well.


4. Amazing VIEWFINDER

Looking through the finder, you will see the shutter speed visible in the lower portion of the finder, and to the right of that a horizontal bar. I have not seen any full mechanical rangefinder camerathat has this function ! Hence the photographer can see the shutter speed setting without lifting the eye from the finder. This may seem like a norm in the modern digital cameras but not for a cameras which was designed back in the 19971.  For metering, the two meter needles intersect that bar, one is controlled by the ASA dial and one is controlled by the light intensity.  Adjust shutter speed or f/stop until the three bars intersect. It may sound rather complex but it's a lot easier in real life operation. Also not to mention that the viewfinder is totally flare proof. The M6

Leica M5

5. It has a BATTERY CHECK FUNCTION

You wouldn't want to caught off guard without battery on critical moments. The frame line selector lever when pushed to the right indicates the current battery level on the viewfinder. Like all of the Ms, the M5 can still operate even without battery.


6. Affordable PRICE

As compared to all the German made rangefinder cameras such as the Leica M as well as the Zeiss Ikon , the M5 price is often lower then most of the M series cameras. Being plague by the ugly duckling syndrome and it's non-conforming to the traditional Leica look, most cameras collectors avoid this camera like a plague hence making it still very affordable. A good used copy will set you back around USD 800 while the M6 would be around USD1300 and above. For the price I think it's an amazing value for a fully hand assembled cameras with such an amazing history.


Below are some images taken with the M5 on various lighting condition

Comment

5 Comments

Leica M6 Classic vs Leica M6 TTL

I was lucky enough to own both Leica M6 classic (Titanium) as well as the M6 TTL (black chrome) during years of my collection. Both are equally well built, film camera with simplistic design which still functions flawlessly even after so many years.

Leica M6 started it's production life from 1984 to 2002 hence there have been quite a few variations and improvements / changes being implemented along it's production life. You will hear models such as the M6 Classic , TTL, Panda, LHSA , Titanium and etc being used to describe these cameras but in general the CLASSIC and TTL is the only difference while the rest are merely cosmetic which sets them apart.

The M6 Classic is the early production units for this model. The design ques was brought over from the older Leica M4 with an additional center weighted light meter while the self timer function was removed. The shutter speed dial, film release lever and etc are all identical. The M6 classic titanium is the polished 'up market' version of the classic M6. It has a titanium 'coated' top and bottom plate and comes with ostrich leather. I stated 'coated' as it wasn't cast out from a block of titanium but merely a coating , but an extremely hard one. The regular M6 classic come with either matte black or chrome finish. Two LR44s batteries fuels the light meter in which could last you easily 10 to 13rolls per change. The battery compartment is located right next to the lens release button which is an ease to use. All M6 comes with three different types of rangefinder magnification which is the 0.72x ( standard ) , 0.85x ( telephoto ) and 0.58x ( wide angle lenses )

Leica M6 Classic Titanium


The M6 TLL on the other hand is the so called improved / updated version of the camera as it was introduced later. The term TTL refers to FLASH TTL and not to be mistaken as metering TTL as both camera has the same metering system. I opted for the 0.85x viewfinder version so it's a tad easier to focus with this camera. The 0.85 is ideal for using with telephoto or wide aperture lenses which stops down to f1.4 or lower.  This camera comes with paired frames lines( 35 / 50 / 75 / 90 / 135mm ) hence the viewfinder seems a bit more cluttered as compared to the M2 but in return you gain some flexibility of using wider choices of lenses without the need of having additional hot shoe viewfinder which could be rather costly and hard to find specially in KL. The M6 TTL has a larger shutter speed knob which makes adjustments a lot easier, an added OFF function on the speed dial as well to conserve battery and the light meter is -1 EV more sensitive.  The TTL light-meter display has three red LEDs   <under, correct, over > while the older M6 only had a left arrow 'under' and right arrow 'over', which made it more difficult to judge how far you were from correct exposure. The frame counter is a tad wider as well than the Classic model. On the down side, the camera is slightly bulkier being 2 to 3 mm taller to make space for the additional electronics on the top plate. The battery life on the TTL isn't as good either. I could only clock 5 to 6 rolls on the average for a fresh set of LR44s and one has to remember to always OFF the camera when not in use or else the battery will be fully drained the next day. I find this really cumbersome at times. The Classic doesn't seems to have this issue at all which gives it a plus point and hence I travel with it most of the time. I brought my M6 Classic Titanium along side with my digital M240 to the Everest Base Camp in Tibet and it worked flawlessly at such harsh condition. Even at -8 deg Celsius with gushing strong wind it operates flawlessly throughout the expedition. It even accidentally survived a drop when it slips from my hand, thanks to the altitude sickness which hits me halfway when I am on my way to the base camp. I am truly glad the camera survived the fall without a scratch thanks to the protective leather casing I was using. You may view the images of taken with the M6 on "Essence of the Himalayas" here.

Leica M6 TTL
Side by side comparison

Using the rangefinder cameras such as these Leica M’s require sometime of getting used to . First of all, it’s a fully manual camera. Focus and exposure setting are all manually operated.  To focus with these rangefinders, one would just have to turn the focusing tab on the lens to match the superimpose subject in a small rectangular box right in the center of the viewfinder. It maybe cumbersome at first but once you get the hang of it it's fairly easy. Being a rangefinder, the cloth shutter curtain is really silent ( as compared to SLR ) as it does not have a flapping mirror. Almost identical to our modern day mirrorless camera such as the Olympus Pen and Fuji X100.  Also the size of the camera body and lenses is a lot smaller hence carrying the camera all day long would no be much of a problem. Smaller also means less obtrusive and intimidating especially when pointing your camera at a total stranger. Last but not least it's the flexibility of using zone focusing which makes shooting candid so much easier. Basically the photographer will shoot based on the predicted 'in-focus' zone without having the need to focus the lens.  This is the reason why most street photographers love using rangefinder camera as compared to SLR. All in all both the M6s are amazing cameras even though I heart the M6 Classic more and I would label them as a true workhorse of the Leica Ms. For the price of a Fuji XT-1, I would take this camera in a heartbeat and you could still inherit them to your grandson when time comes : )
 

If you would like to know more about other Leica M models in the past article ...click here !


5 Comments

10 Comments

The Best Polaroid Camera - Polaroid 600SE

polaroid 600se

Last year, I was lucky enough to get my hands on a unit of Polaroid 600SE aka GOOSE instant camera at a relatively low price on ebay. I've been dreaming to get this camera for a very long time . Thanks a lot to my Polaroid fanatic friend , Afoi for the poisoning lol.

The Polaroid 600SE is truly an awesome instant rangefinder camera ! It is the “flagship” professional cameras for  Polaroid, based on the Mamiya Press design which both the Mamiya and Polaroid have been discontinued for many years. The camera have inter-changeable lens mount and it utilizes Mamiya lenses that produce amazingly crisp images. Being a medium format, the details and bokeh (out of focus rendition)  is indeed awesome. The subject is pin sharp while the bokeh is buttery smooth. The standard lens which comes along with the camera is a fixed 127mm f4.7 lens with Seiko leaf shutter.  There are additional lens option such as the Mamiya 75mm f/5.6  being the wide angle and the Mamiya 150mm f/5.6 as portrait lens are sold separately. I can't comment on these as I haven't got the chance to try out other lenses just yet.


Tips on Using the Polaroid 600SE

Using this camera at first seems a little quirky for most people, it’s LEFT HANDED and not to mentioned it weighs a ton ( almost 1.7kg ) !  You could easily use this as a dumbbell substitute when you feel like working out. Operating this camera is fairly easy as this is a fully mechanical, just need to remember the sequence. For those those is used to shooting with film medium format camera it would be pretty much at home for them. Here are the steps in short:

1. Getting the film - This camera uses the Fp100c ( color film 100 iso ) and Fp3000b ( black and white 3000 iso ) instant film manufactured by Fujifilm. It's sad to say that Fuji in the recent month has just discontinued the black and white FP3000b film pack hence if you have the chance....do stock up ! It's one of my favorite instant film and the flexibility of 3000 iso is simply awesome. A packet is around RM65 now for a box of 10 exposures. I used to get it for as low as RM46/ box previously before the announcement of discontinuation.   If you could buy in bulk, you could certainly save some money but do bear in mind of the expire date.

2. Load the film into the film back - This is one tricky part which most people got it wrong. First, make it a habit to check and clean the rollers of the film back. The built up gooey like substance from the fp instant film will hinder the movement of the roller. Just use a damp cloth and to clean the side of the roller contact point when necessary. Just make sure the roller moves freely as the added friction might cause the film tab to break and the entire pack of film will be wasted.

To install, pull up on the latch to open the film holder door, the door does not open flat hence don't force it. Always hold the film pack by the edges, not in the center. Slide the pack in at an angle, then push it down into place. If done correctly the film pack will be flush with the sides of the holder. Check that the white tabs are not caught between the pack and the holder. It needs to hang out of the film case. Close door and latch the metal hook to the holder. The final outcome should be as below. You would need to pull out the first sheet of the film to start using. That would get you at frame no.1 as indicated.

3. Metering - As the camera doesn't have a built in light meter, one would have to use an external light meter instead. I would suggest that you get the awesome Voigtlander VC2 meter and attach it onto the hand grip hot shoe. This is interchangeable with most cameras like Leica M and Nikon SLRs. If you have other light meters, feel free to use it too. I wouldn't suggest to use sunny 16 rule for instant film as the exposure latitude is not as wide as normal film . Further more price per exposure is relatively high around Rm6 per shot hence you would really want to get it right the first time.

4. Remove dark slide - Remove the dark slide when you are ready to shoot. Pretty simple and no explanation needed. Make sure you keep the dark slide back on when it's done as finding a used / replacement would be a bit costly.

5. Cock the shutter - you need to cock the shutter at the lens before pulling the trigger with your left hand. Just pull the lever down towards the left side until it clicks.

6. Exposure , Focus , Shoot  - Set the shutter speed and aperture on the lens.  Focusing on the 600SE is pretty much like all other rangefinder camera.  You just need to focus the image by aligning two images together at the little square box in the middle. Once done, just pull the trigger at the hand grip.

7. Removing the exposed film - Unlike most of the Polaroid cam which we a familiar with since our childhood where the film will be ejected automatically from the bottom of the camera with a loud winding sound, this 600SE operates rather differently. It's a two step process. First you have to pull out the white color film tab manually to activate the developing chemicals as per dig.40.  Then the second film tab will eject from the film back. Just pull the entire sheet out ( dig.41 ) in one single motion. It could be a little tight for the first few sheets but once you reach exposure 4, it should be a lot easier. Just wait for around 40 sec and you may peel off the instant film starting from the edges as per dig.42.

Screen Shot 2014-10-08 at 1.58.08 AM.png

Features

  • Variable aperture and shutter settings: Enables better stop- action and depth-of-field
  • Bright-image coincidence type rangefinder: Ensures sharp focus and accurate framing
  • Sturdy hand grip with adjustable hand strap: Simplifies handling and operation
  • Comes with standard Mamiya 127mm f/4.7 lens ~ produces incredible crisp, full-range images
  • Other coated, color-corrected lenses available

Specification

  • Shutter: 1/500-B with X-synch for flash
  • Flash: Uses conventional flash with X-synch
  • Interchangeable backs for flexibility ( Polaroid or film back )
  • Die cast aluminum body
  • no built in TTL metering. I usually use my iPhone light meter application and it works great

( Spec sheet plugged from camerapedia )

Below are some of the images which I have taken while experimenting with this camera. I’m using the Fujifilm FP3000B film for this series and it’s great for indoor studio purpose due to the 3000 ISO. This film is very stable as compared to the IMPOSSIBLE PROJECT Polaroids which I will touch on later when I have time. I’m not a big fan of the the color version of the Fuji FP100C as the pictures always turn out more cold. Not sure why but some pack might turn out nicer than the other even it’s shot under the same exposure. I have tried two packs which the color is slightly more magenta and I love it lots but I’m still trying to figure out why the variation.

So what’s the verdict you might ask ? I think it’s an awesome camera to have specially for those who love instant film. Image quality is superb and being medium format, the out of focus rendition is really smooth and tonal graduation is awesome. However, it’s really huge and heavy. Lugging it around for street photography is a big no no. You will ended up pulling a crowd instead of being discreet. More suited for studio or portrait use. Hope you like sharing and stay tuned for more ! Thanks


PS : Feel free to download the user manual HERE

film photography malaysia polaroid600se

Caution  !!

The Polaroid film process uses a caustic jelly which is safely packed inside sealed containers within the film pack. If accidentally you should get some of this jelly on your skin, wipe it off immediately to avoid an alkali burn, wash the area with plenty of water as soon as possible. It is particularly important to keep the jelly away from eyes and mouth.


10 Comments