
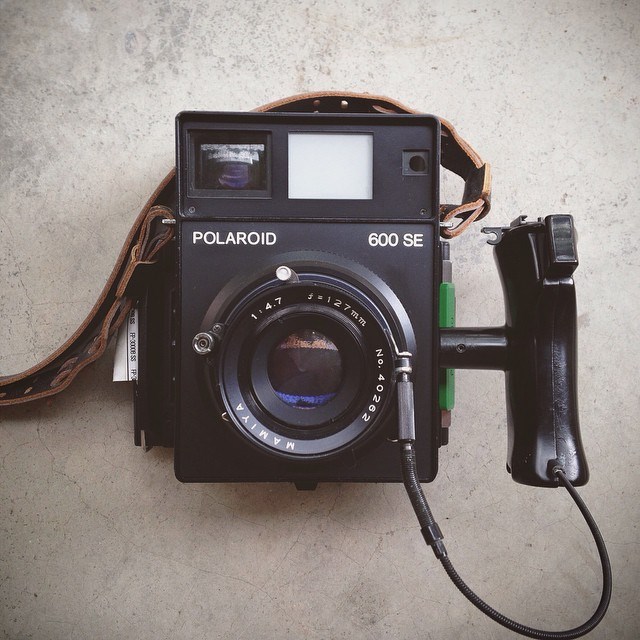
Last year, I was lucky enough to get my hands on a unit of Polaroid 600SE aka GOOSE instant camera at a relatively low price on ebay. I've been dreaming to get this camera for a very long time . Thanks a lot to my Polaroid fanatic friend , Afoi for the poisoning lol.
The Polaroid 600SE is truly an awesome instant rangefinder camera ! It is the “flagship” professional cameras for Polaroid, based on the Mamiya Press design which both the Mamiya and Polaroid have been discontinued for many years. The camera have inter-changeable lens mount and it utilizes Mamiya lenses that produce amazingly crisp images. Being a medium format, the details and bokeh (out of focus rendition) is indeed awesome. The subject is pin sharp while the bokeh is buttery smooth. The standard lens which comes along with the camera is a fixed 127mm f4.7 lens with Seiko leaf shutter. There are additional lens option such as the Mamiya 75mm f/5.6 being the wide angle and the Mamiya 150mm f/5.6 as portrait lens are sold separately. I can't comment on these as I haven't got the chance to try out other lenses just yet.
Tips on Using the Polaroid 600SE
Using this camera at first seems a little quirky for most people, it’s LEFT HANDED and not to mentioned it weighs a ton ( almost 1.7kg ) ! You could easily use this as a dumbbell substitute when you feel like working out. Operating this camera is fairly easy as this is a fully mechanical, just need to remember the sequence. For those those is used to shooting with film medium format camera it would be pretty much at home for them. Here are the steps in short:
1. Getting the film - This camera uses the Fp100c ( color film 100 iso ) and Fp3000b ( black and white 3000 iso ) instant film manufactured by Fujifilm. It's sad to say that Fuji in the recent month has just discontinued the black and white FP3000b film pack hence if you have the chance....do stock up ! It's one of my favorite instant film and the flexibility of 3000 iso is simply awesome. A packet is around RM65 now for a box of 10 exposures. I used to get it for as low as RM46/ box previously before the announcement of discontinuation. If you could buy in bulk, you could certainly save some money but do bear in mind of the expire date.
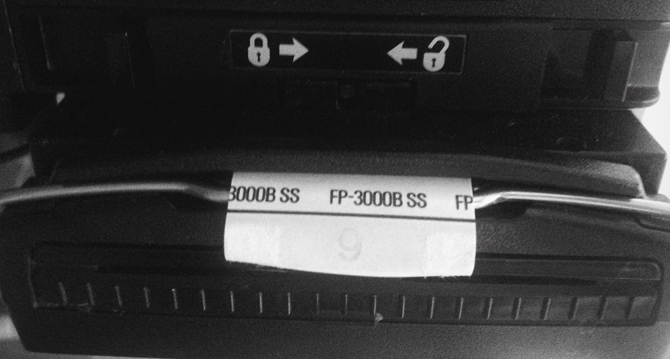
2. Load the film into the film back - This is one tricky part which most people got it wrong. First, make it a habit to check and clean the rollers of the film back. The built up gooey like substance from the fp instant film will hinder the movement of the roller. Just use a damp cloth and to clean the side of the roller contact point when necessary. Just make sure the roller moves freely as the added friction might cause the film tab to break and the entire pack of film will be wasted.
To install, pull up on the latch to open the film holder door, the door does not open flat hence don't force it. Always hold the film pack by the edges, not in the center. Slide the pack in at an angle, then push it down into place. If done correctly the film pack will be flush with the sides of the holder. Check that the white tabs are not caught between the pack and the holder. It needs to hang out of the film case. Close door and latch the metal hook to the holder. The final outcome should be as below. You would need to pull out the first sheet of the film to start using. That would get you at frame no.1 as indicated.
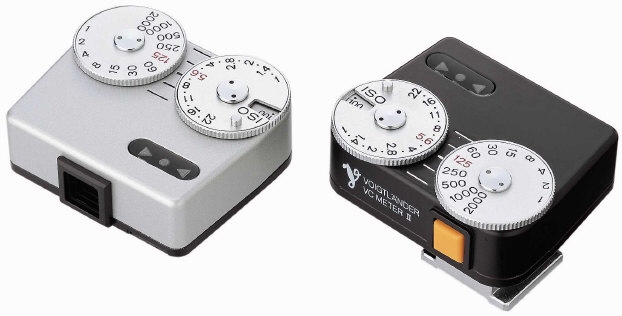
3. Metering - As the camera doesn't have a built in light meter, one would have to use an external light meter instead. I would suggest that you get the awesome Voigtlander VC2 meter and attach it onto the hand grip hot shoe. This is interchangeable with most cameras like Leica M and Nikon SLRs. If you have other light meters, feel free to use it too. I wouldn't suggest to use sunny 16 rule for instant film as the exposure latitude is not as wide as normal film . Further more price per exposure is relatively high around Rm6 per shot hence you would really want to get it right the first time.
4. Remove dark slide - Remove the dark slide when you are ready to shoot. Pretty simple and no explanation needed. Make sure you keep the dark slide back on when it's done as finding a used / replacement would be a bit costly.
5. Cock the shutter - you need to cock the shutter at the lens before pulling the trigger with your left hand. Just pull the lever down towards the left side until it clicks.
6. Exposure , Focus , Shoot - Set the shutter speed and aperture on the lens. Focusing on the 600SE is pretty much like all other rangefinder camera. You just need to focus the image by aligning two images together at the little square box in the middle. Once done, just pull the trigger at the hand grip.
7. Removing the exposed film - Unlike most of the Polaroid cam which we a familiar with since our childhood where the film will be ejected automatically from the bottom of the camera with a loud winding sound, this 600SE operates rather differently. It's a two step process. First you have to pull out the white color film tab manually to activate the developing chemicals as per dig.40. Then the second film tab will eject from the film back. Just pull the entire sheet out ( dig.41 ) in one single motion. It could be a little tight for the first few sheets but once you reach exposure 4, it should be a lot easier. Just wait for around 40 sec and you may peel off the instant film starting from the edges as per dig.42.

Features
- Variable aperture and shutter settings: Enables better stop- action and depth-of-field
- Bright-image coincidence type rangefinder: Ensures sharp focus and accurate framing
- Sturdy hand grip with adjustable hand strap: Simplifies handling and operation
- Comes with standard Mamiya 127mm f/4.7 lens ~ produces incredible crisp, full-range images
- Other coated, color-corrected lenses available
Specification
- Shutter: 1/500-B with X-synch for flash
- Flash: Uses conventional flash with X-synch
- Interchangeable backs for flexibility ( Polaroid or film back )
- Die cast aluminum body
- no built in TTL metering. I usually use my iPhone light meter application and it works great
( Spec sheet plugged from camerapedia )
Below are some of the images which I have taken while experimenting with this camera. I’m using the Fujifilm FP3000B film for this series and it’s great for indoor studio purpose due to the 3000 ISO. This film is very stable as compared to the IMPOSSIBLE PROJECT Polaroids which I will touch on later when I have time. I’m not a big fan of the the color version of the Fuji FP100C as the pictures always turn out more cold. Not sure why but some pack might turn out nicer than the other even it’s shot under the same exposure. I have tried two packs which the color is slightly more magenta and I love it lots but I’m still trying to figure out why the variation.
So what’s the verdict you might ask ? I think it’s an awesome camera to have specially for those who love instant film. Image quality is superb and being medium format, the out of focus rendition is really smooth and tonal graduation is awesome. However, it’s really huge and heavy. Lugging it around for street photography is a big no no. You will ended up pulling a crowd instead of being discreet. More suited for studio or portrait use. Hope you like sharing and stay tuned for more ! Thanks
PS : Feel free to download the user manual HERE


Caution !!
The Polaroid film process uses a caustic jelly which is safely packed inside sealed containers within the film pack. If accidentally you should get some of this jelly on your skin, wipe it off immediately to avoid an alkali burn, wash the area with plenty of water as soon as possible. It is particularly important to keep the jelly away from eyes and mouth.